Adding Instances to SSL
Last updated 11-SEPT-2020
This document will show internal zesty stakeholders how to set up TLS with Fastly’s Concierge Service.
Before you begin
- You must have access to Fastly
- You must have the role of SuperUser in order to complete this task. If you do not have access or this role assignment reach out to the Engineering team leads.
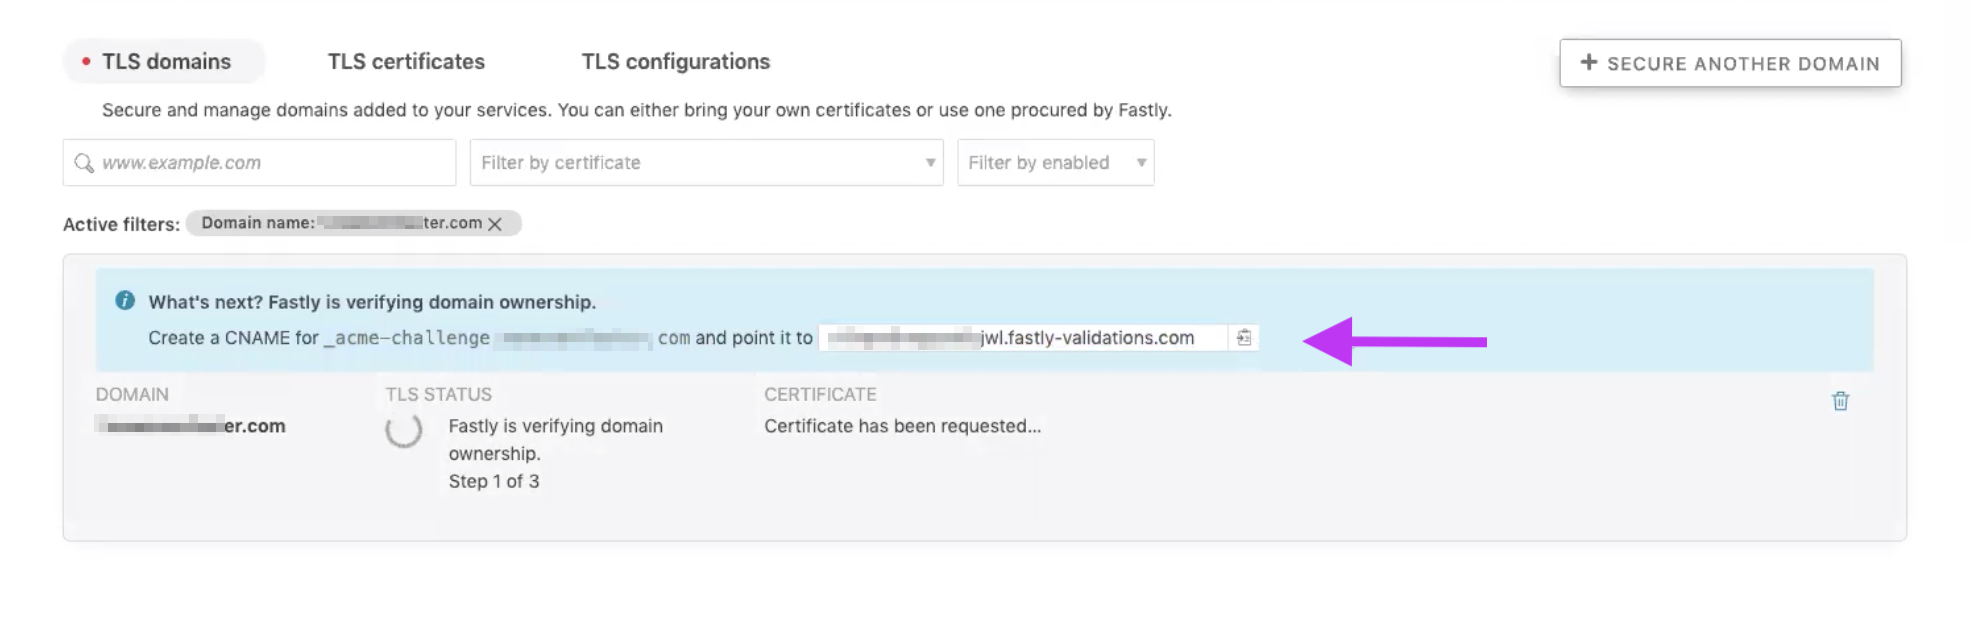
- If you’re configuring a subdomain only where the apex is not on Zesty, you’ll need to reach out to Fastly, verify ownership via a TXT record.
This is a 2-step process; first we’ll add the domain to a Service, and then we’ll add it to the HTTPS and Network.
After that you may need to verify that you own the domain by adding a CNAME record.
Step 1: Add the domain to a Service Configuration
1. After you sign in to Fastly, select Configure from the main menu. Ensure you’re on prod-site-delivery. 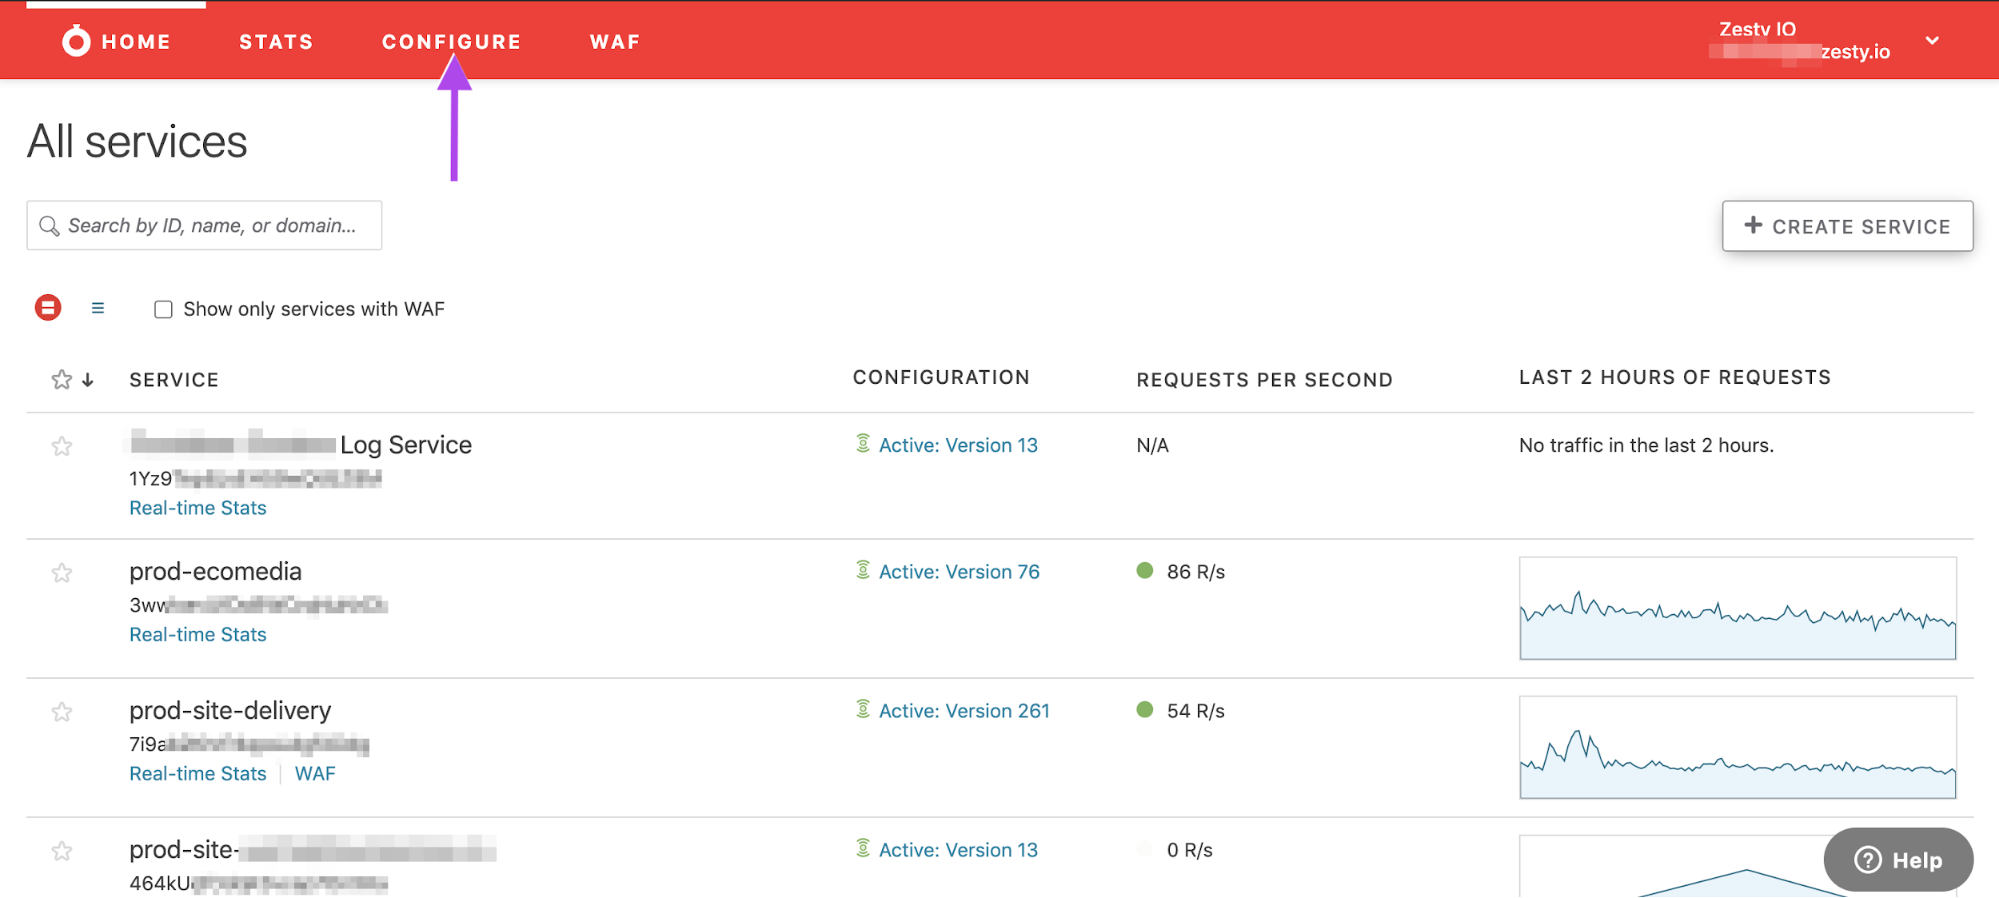
If necessary click the Switch Services dropdown and select prod-site-delivery from there. 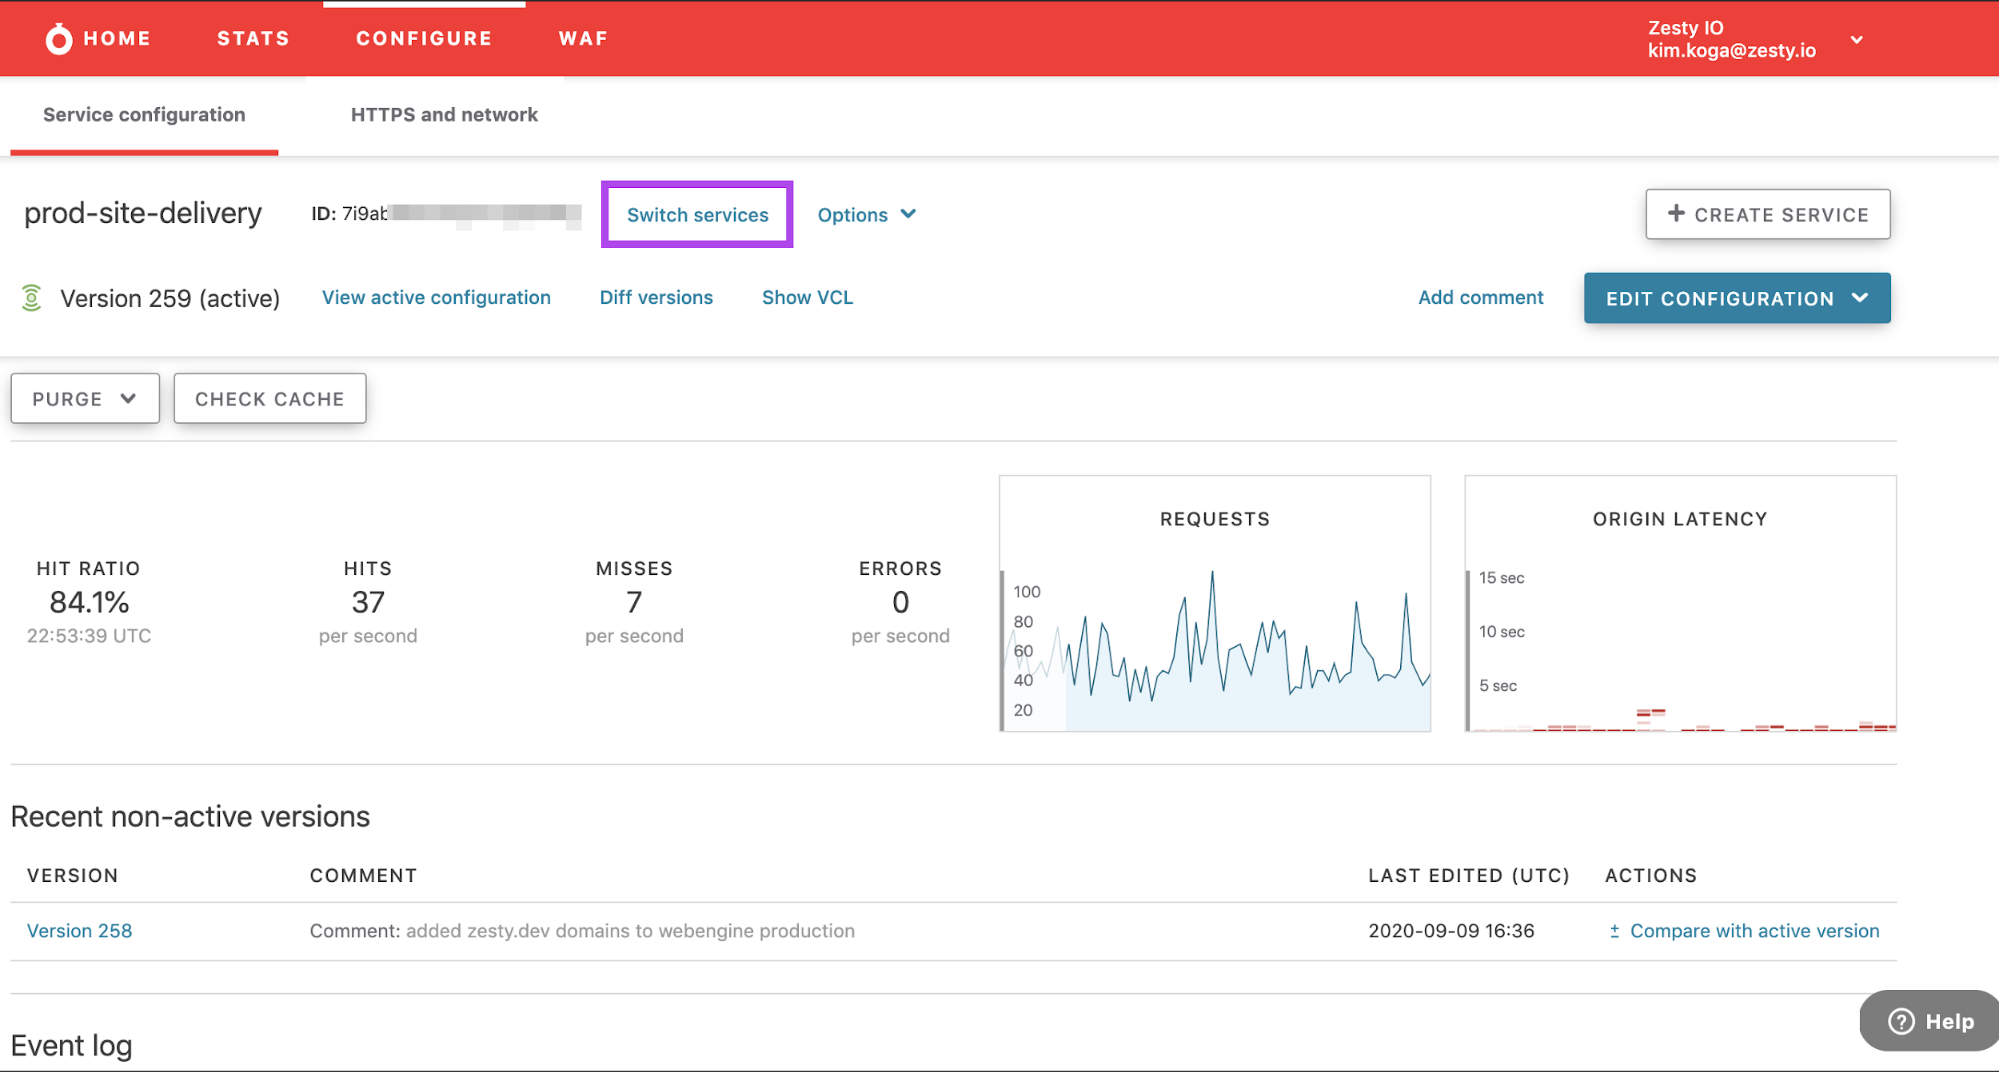
b. Click the blue Edit Configuration button and select Clone. 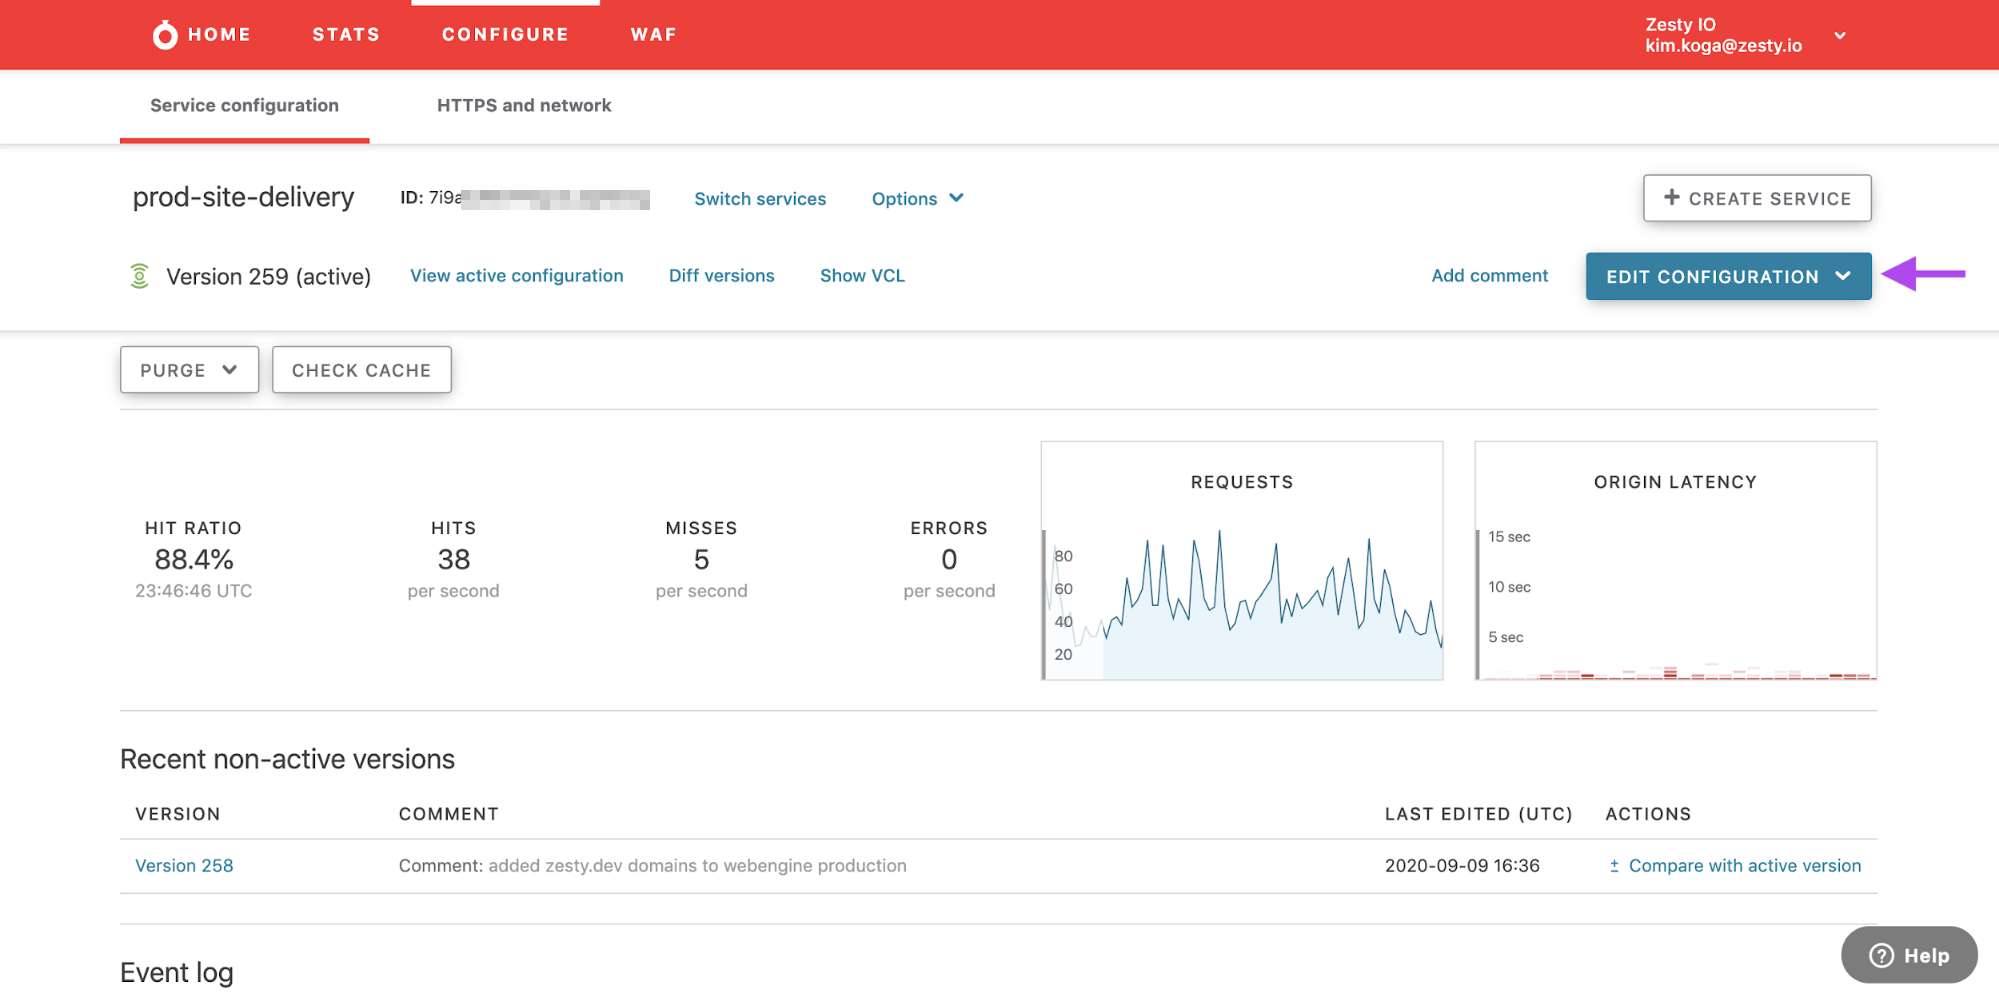
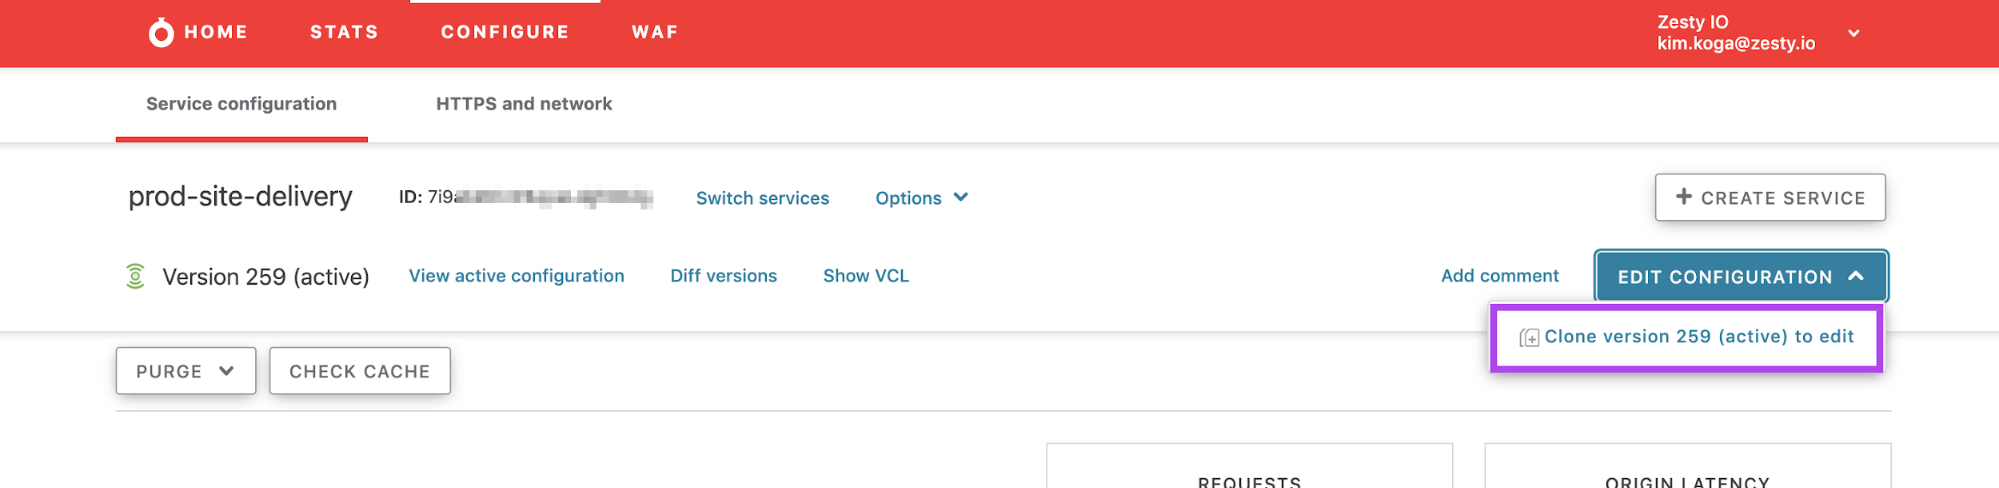
NOTE: if you see the There are validation warnings in your VCL. error, it’s likely that they already existed and you do not need to worry about them.
c. Now you can add your domain. Click the white Create Domain button 
d. Fill out the domain name and click the blue Add button. Add as many domains as you need to. 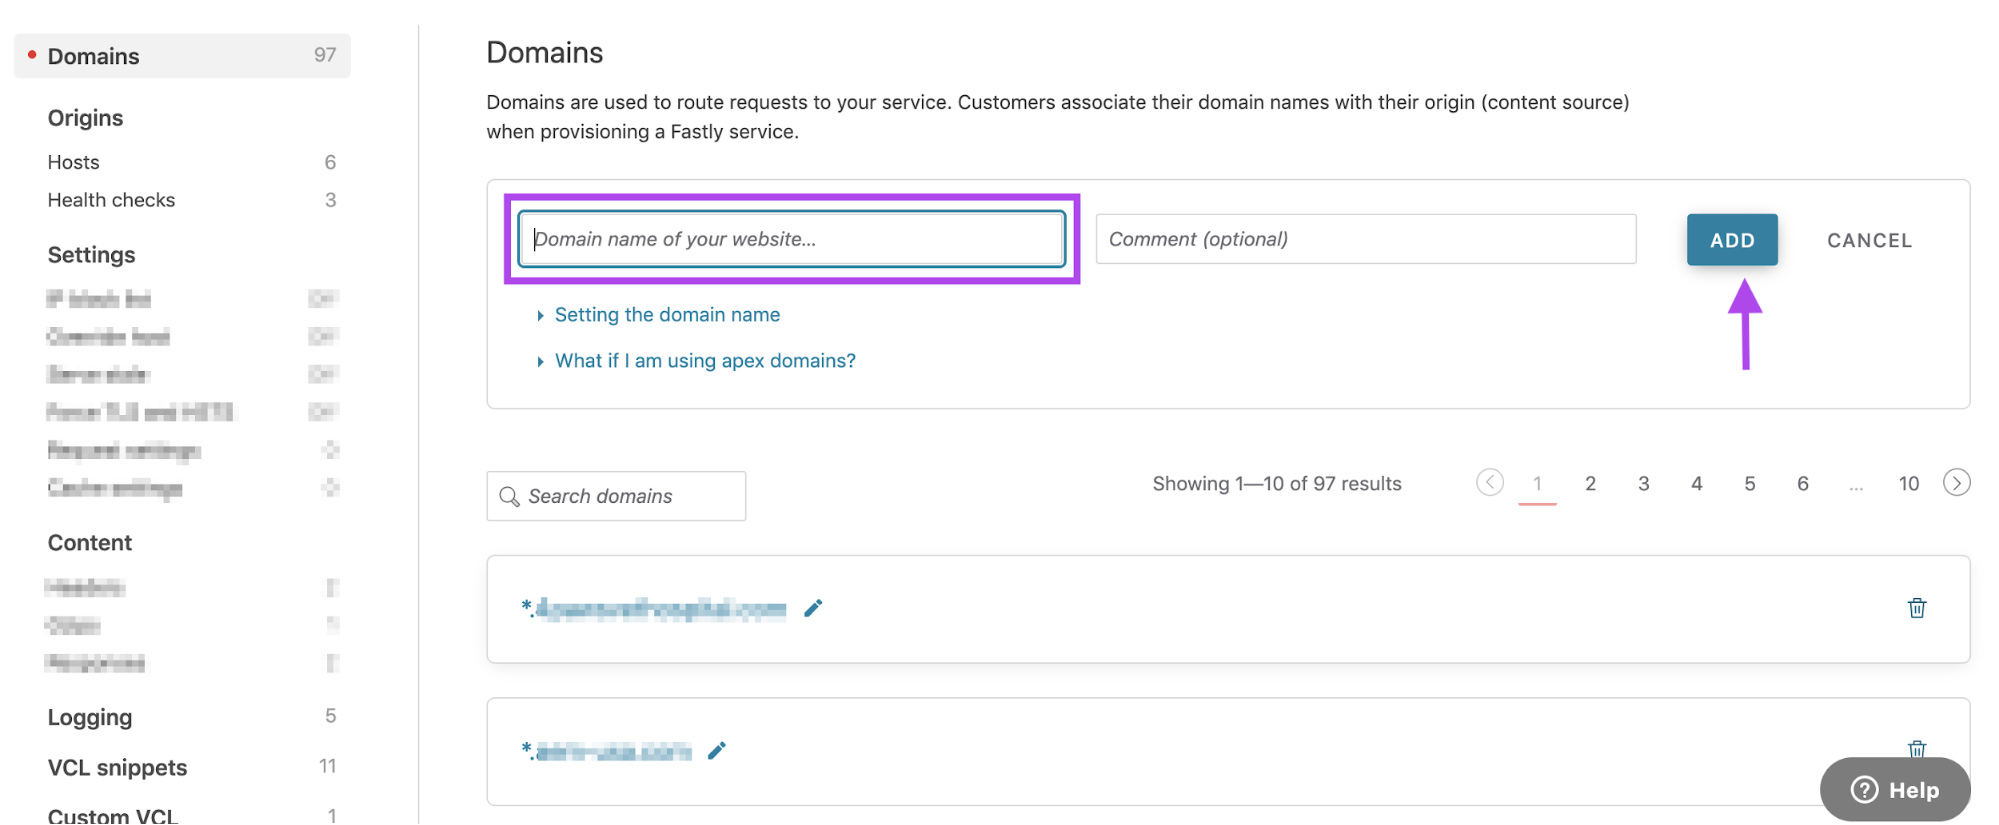
f. After you add all the domains you want to add, activate the clone by clicking the purple Activate button. 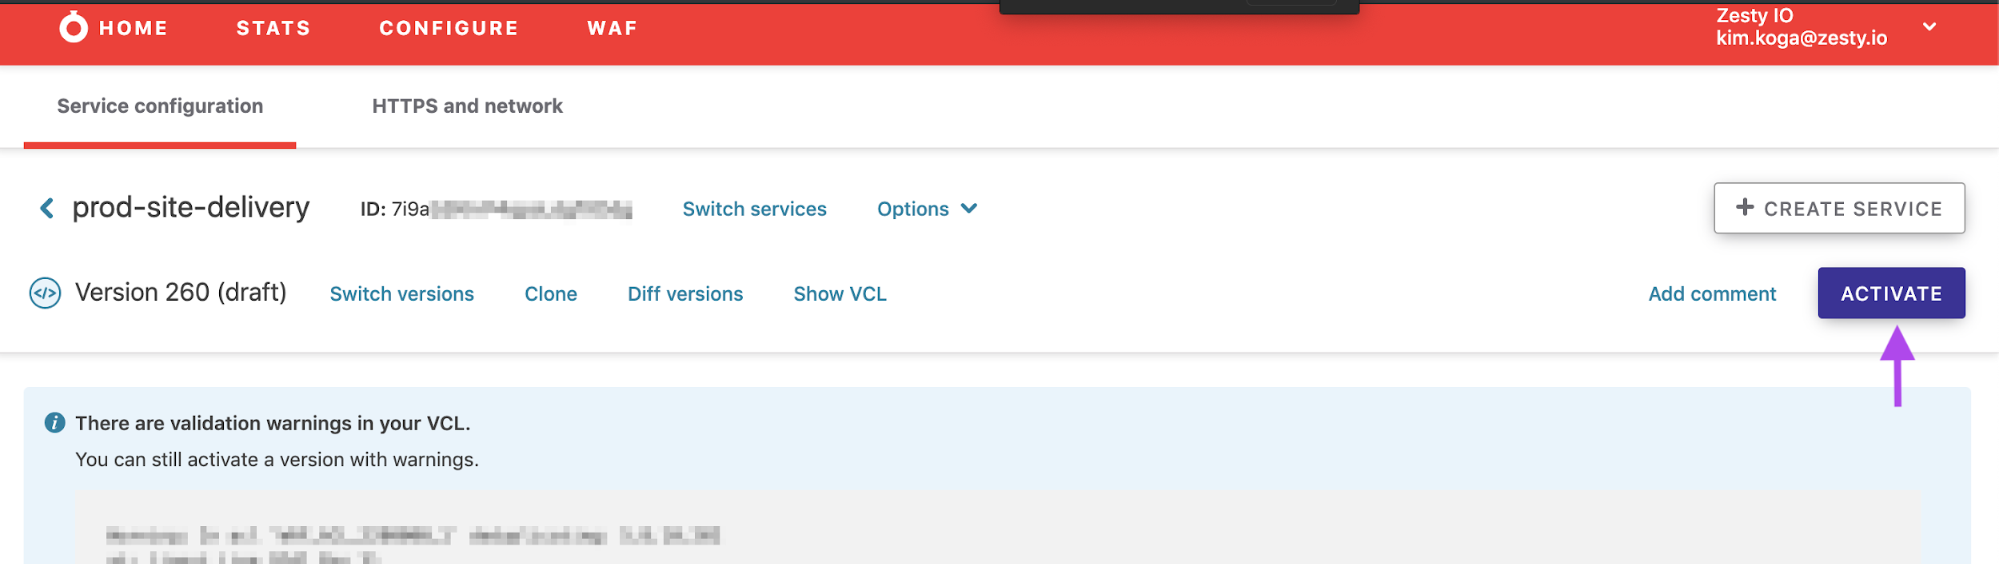
Step 2: Add the URL to HTTPS and Network (This portion of the flow is out of date as of June 2021 - Gisele has note of the process & she'll need to update this doc.)
a. Once activation is complete, navigate to the HTTPS and Network section from the secondary menu so we can add the domain as a TLS domain. 
b. Click the white Secure Another Domain button. 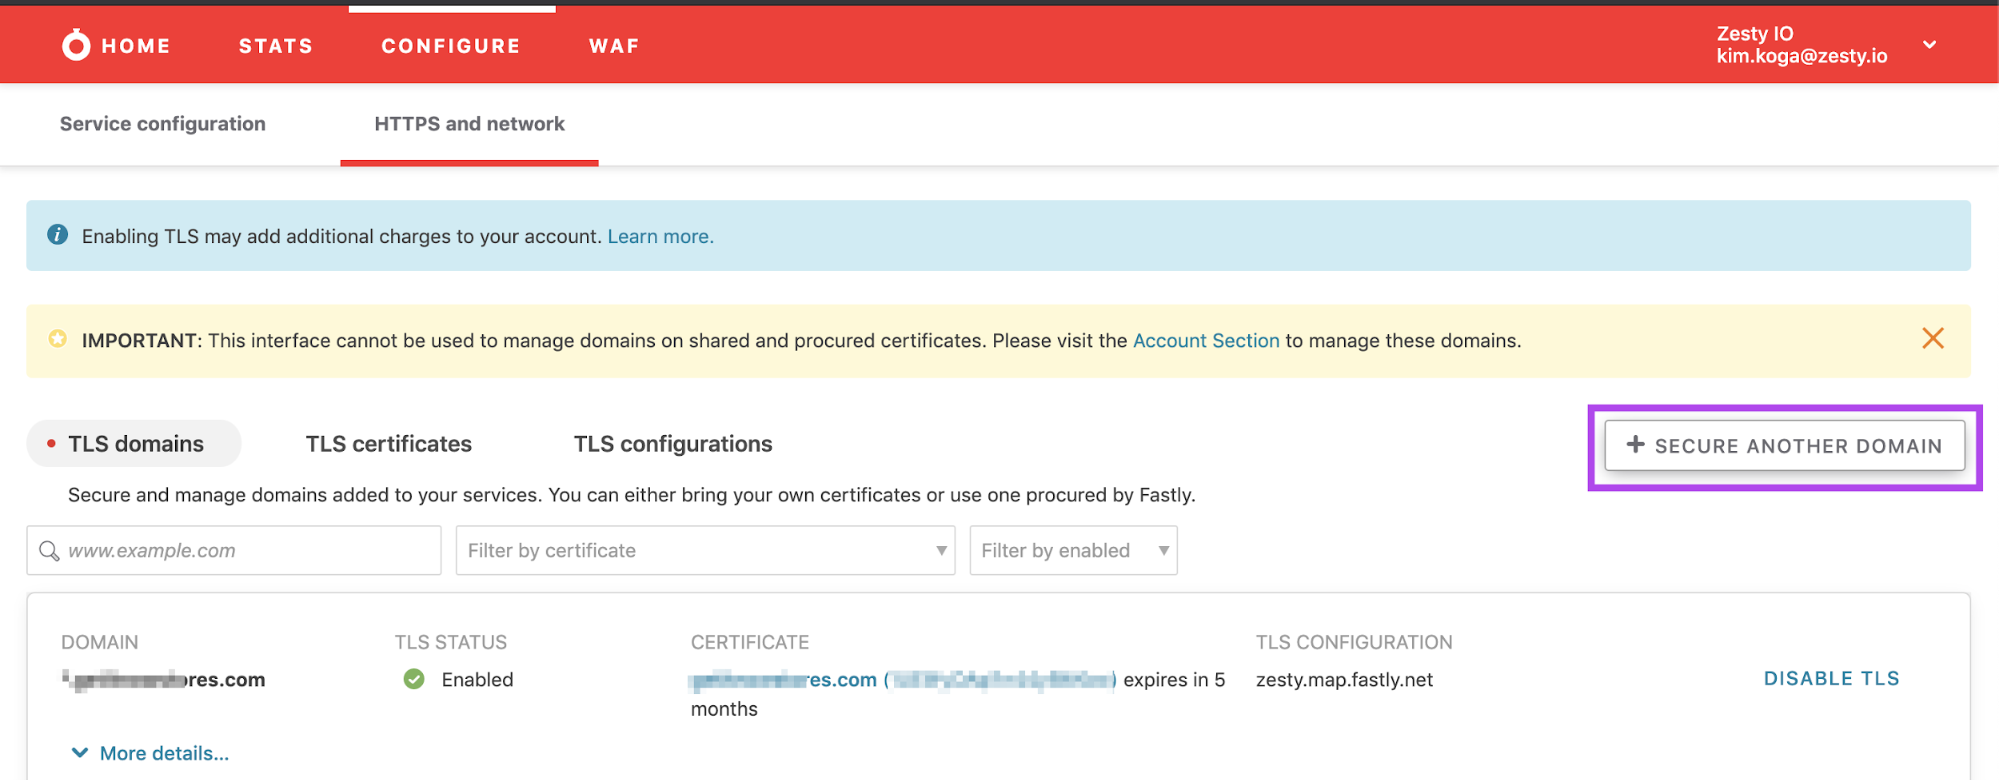
b-1.And a modal will pop up and allow you to enter the same domain that you entered in Part 1: step C. 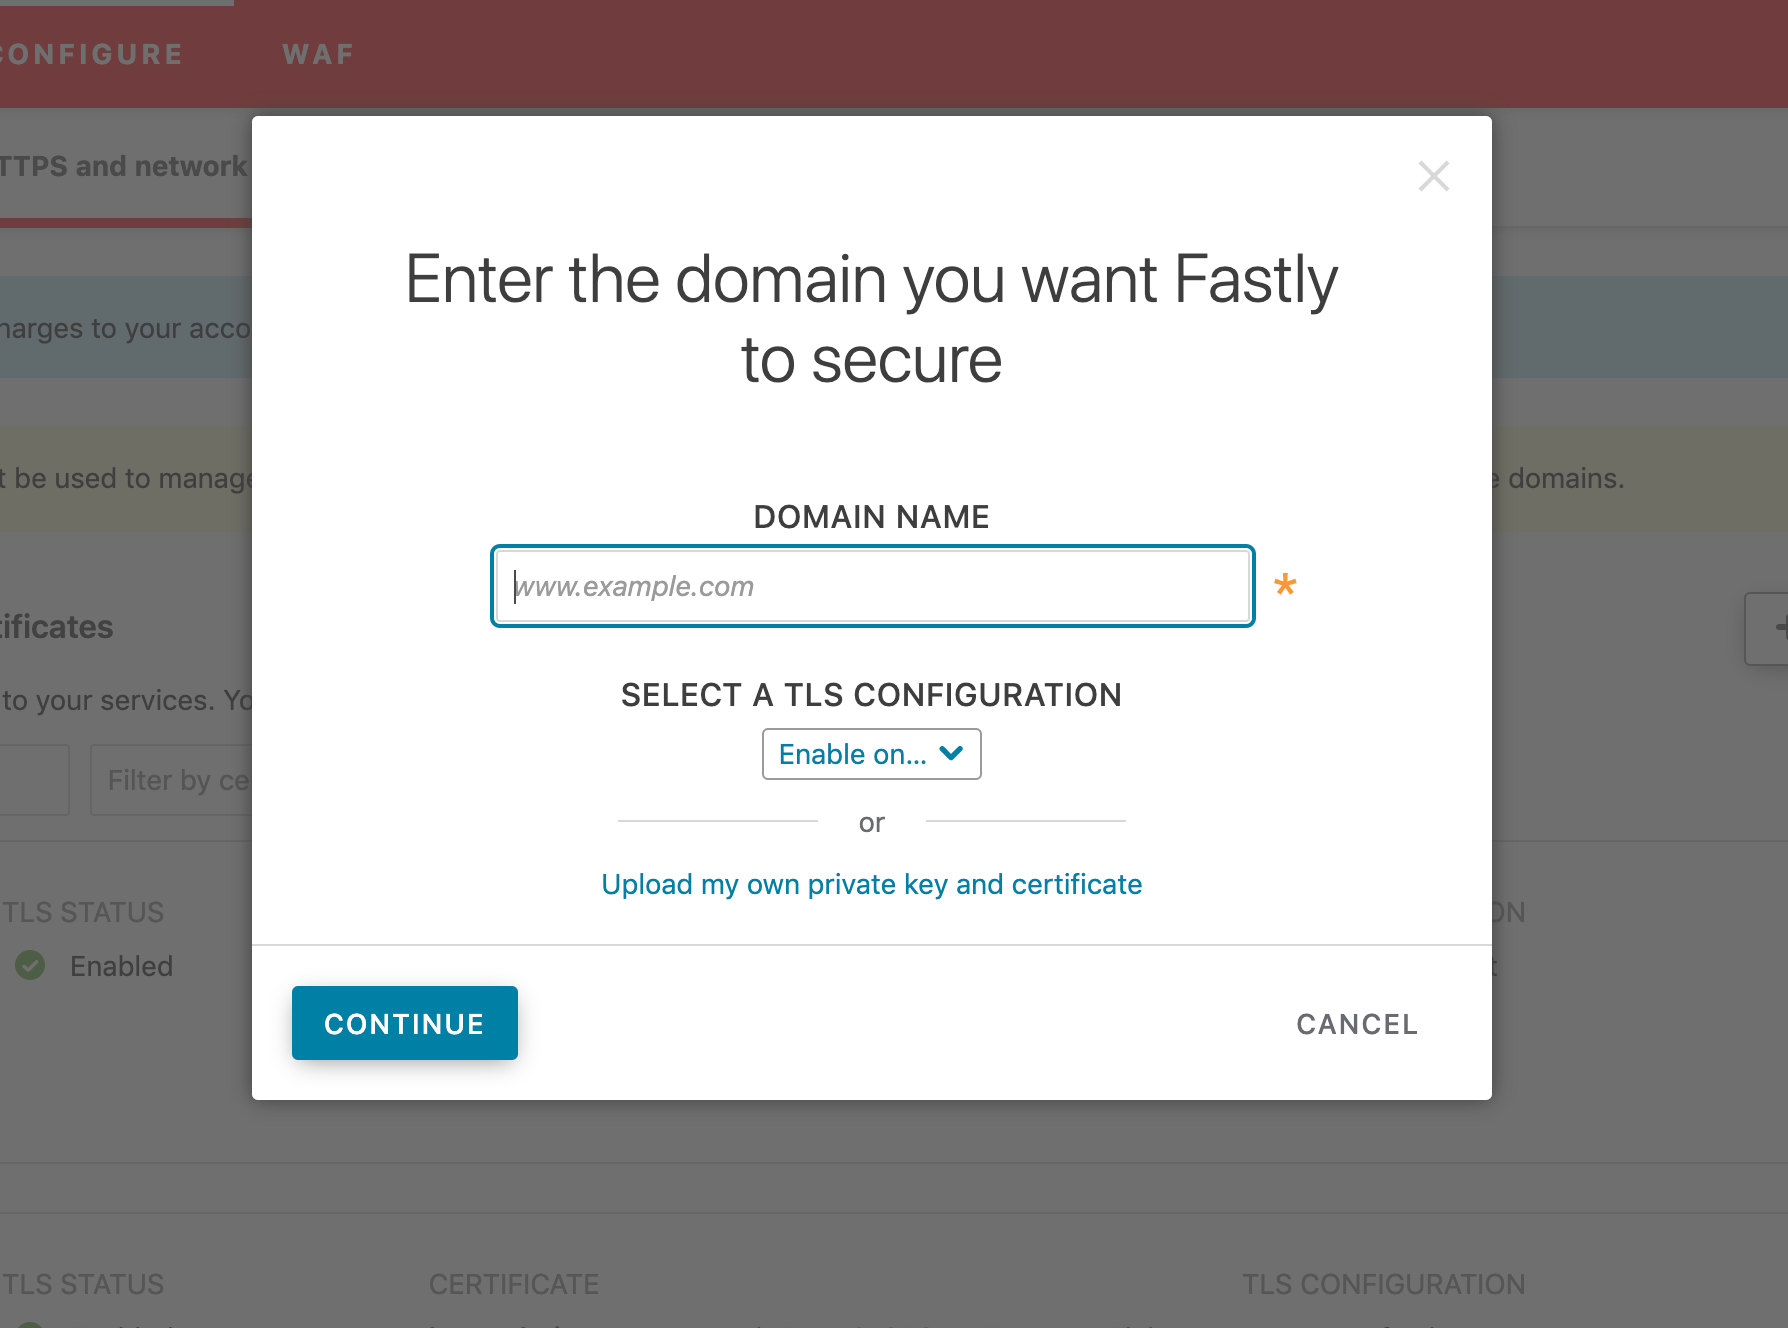
b-2.When selecting a configuration from the dropdown select: zesty.map.fastly.net and then click the blue Continue button. 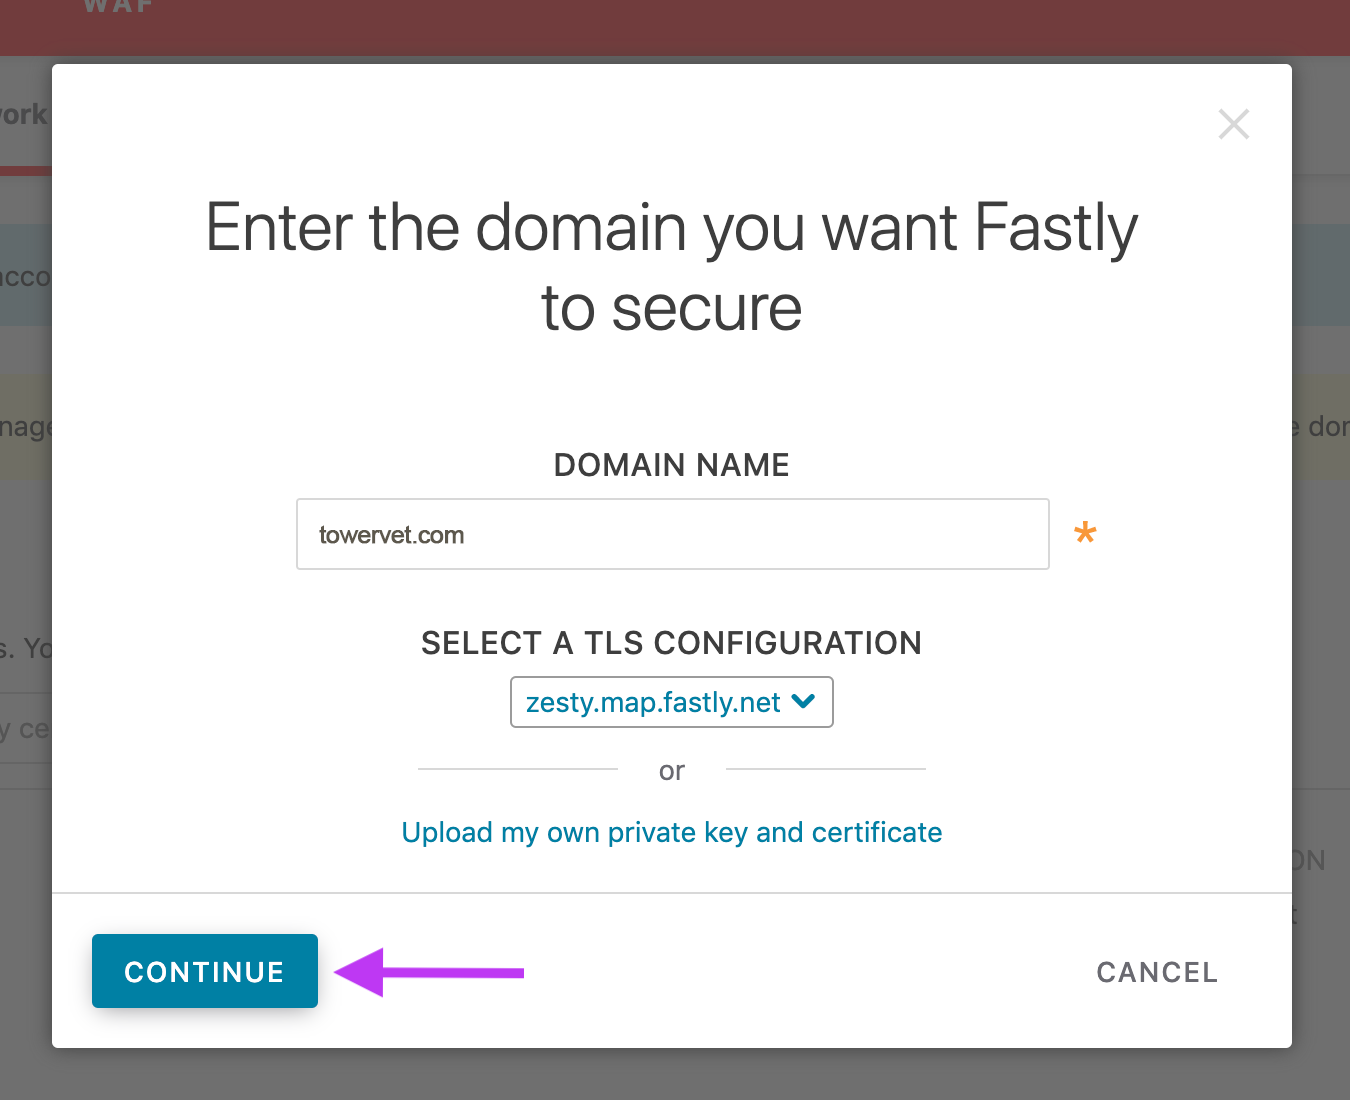
c. Verify Domain Ownership: You may be required to verify domain ownership by adding a CNAME record. If this is required then ask the customer to add a CNAME and point it wherever Fastly says to. After the CNAME has been added, you should be able to flip the HTTPS switch in Zesty. NOTE: the only way to verify domain ownership is through a CNAME entry. We can no longer use URL verification. Instances already pointed at Zesty's IPs listed in the docs will auto-verify based on the IPs